
Tempe Water Heaters — Why Is My Water Heater Leaking? Repair or Replacement?
Tempe Water Heaters handles water heater replacement, installation and repair across Tempe, AZ, and this guide reflects what actually fails on tanks, tankless heat exchangers, anode rods and gas or electric controls in Arizona desert conditions.
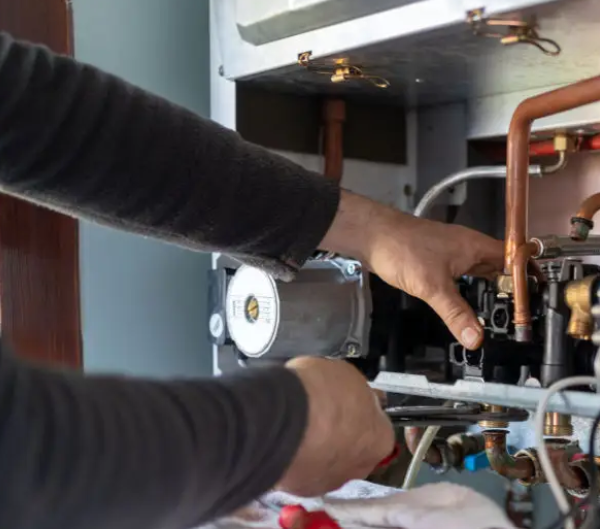
Finding water pooled around the base of the water heater tends to trigger panic before it triggers troubleshooting — understandable, since it's rarely clear at first glance whether the fix is a $15 valve or an entire replacement. The good news is that most leaks in Tempe homes trace to one of a handful of predictable spots, and figuring out which one is mostly a process of elimination. Below is the order of operations: contain it, find it, then decide what it actually needs.
Step one: stop things from getting worse
- Cut the water supply. Reach the cold-water inlet valve above the tank and close it if you can safely do so. Can't budge it? Shut the main water valve for the whole house instead.
- Kill the power or the gas. Electric unit: flip the dedicated breaker off at the panel. Gas unit: rotate the control knob to OFF. Either way, leave any burner or element alone until the leak is controlled.
- Protect what's nearby. Water heaters in Tempe garages and interior closets sit on slab, and slab spreads standing water quickly toward drywall, baseboards and anything stored on the floor.
- Leave the tank full for now unless the leak is fast and heavy — the water level remaining in the tank is actually a useful clue for locating the source.
Smelling gas changes the plan entirely: get everyone outside, and call the gas utility or 911 from a safe distance before doing anything else. If the leak is active and spreading, this is the point to request emergency water heater service rather than keep troubleshooting solo.
Tracing the water back to its origin
Wipe every surface dry, lay down paper towels at each suspect point, and check back in a few minutes to see where moisture reappears first. Because water runs downward along the tank's exterior, a puddle at the floor is frequently evidence of a leak that started well above it.
Relief valve discharge (fixable)
If the drip is coming from the discharge pipe hanging off the temperature-and-pressure relief valve, the valve itself may be worn out — or it may be functioning correctly because pressure or temperature inside the tank is running too high. In Tempe that's frequently the result of a closed plumbing loop with no working expansion tank, or simply high incoming street pressure. Swapping the valve alone without addressing the underlying pressure issue just buys you a few more months before it happens again.
Drain valve at the bottom (fixable)
A plastic drain spigot that's aged, warped, or was left slightly open after a flush will weep steadily. Tightening it, capping it, or swapping in a proper valve usually solves it in minutes.
Fittings at the top of the tank (fixable)
Flex lines, unions, and the dielectric nipples where copper meets steel all loosen or corrode with age. If the water is clearly tracking down the tank's exterior from somewhere near the top, a fitting — not the tank — is almost always the culprit.
Element access panel on electric tanks (fixable)
Water found behind an element access panel usually means the gasket sealing that element has failed. Replacing the element assembly and gasket together resolves it.
Condensate line on high-efficiency or tankless units (sometimes not a leak at all)
Condensing equipment produces mildly acidic condensate that has to drain somewhere. A clogged line or a full neutralizer canister can mimic a leak — worth checking before assuming the worst. Our tankless service page covers this in more depth.
The tank shell itself (not fixable)
If water is weeping from the tank's outer jacket, or pooling steadily at the base while every valve and fitting above it stays bone dry, the glass lining inside has broken down and the steel underneath has corroded through. No weld, sealant or patch can safely restore a vessel meant to hold pressurized hot water — at that point replacement is the only real option.
Why tanks give out from the inside in Tempe specifically
A handful of local conditions combine to shorten a tank's working life here. Mineral-heavy water — roughly 12 to 18 grains per gallon coming through the SRP/Colorado River blend — builds an insulating sediment layer on the tank floor that traps heat and accelerates fatigue in the steel above it. Once the anode rod is used up, which can happen well before any visible symptoms appear, the tank's own steel becomes the next thing corroding. And on closed plumbing systems, thermal-expansion pressure spikes hit the shell and relief valve on every single heating cycle, day after day. Layer in a garage that swings past 110°F for months at a time, and a tank quietly failing in year 11 isn't bad luck — it's the expected outcome without annual flushing and anode checks along the way.
Repair or replace? A simple decision rule
Repair when:
- The leak is at a valve, fitting, connector or element gasket.
- The unit is under roughly eight years old.
- The tank body itself is intact, with no rusty weeping around the jacket seams.
- The heater has been trouble-free until now.
Replace when:
- The leak is coming from the tank body itself, not a fitting or valve.
- The unit has already passed the ten-year mark and now needs a major part.
- Discolored hot water or heavy sediment rumbling accompanies the leak.
- You've already had two or three separate repair visits in the last couple of years.
- The current unit was undersized for your household to begin with — worth pairing the leak fix with a proper sizing review, covered in our sizing guide.
Rule of thumb: once a repair bill starts approaching a meaningful fraction of what a new, fully warrantied unit would cost — and the tank is already deep into its expected Arizona lifespan — putting that money toward replacement usually makes more sense than extending an aging tank's life by another year or two.
What a properly done replacement includes
A replacement done right covers more than swapping boxes: correct sizing for your household's actual usage, a new relief valve piped to a compliant discharge point, an accessible shutoff valve, fresh flexible connectors, a drain pan routed somewhere a future leak won't cause damage, confirmed thermal-expansion control, proper venting or a verified dedicated circuit depending on fuel type, and hauling away the old unit. Permitting and inspection go through the City of Tempe for addresses within city limits, or the applicable town, city or county authority elsewhere in the East Valley.
What to do next
If it's safe to do so, snap a photo of where the water is showing up and another of the unit's rating plate, then send both through our free quote form. You'll get a clear answer — a leak repair, a component-level fix through our water heater repair service, or a replacement recommendation — with no obligation attached.
More From the Blog
- How Much Does Water Heater Replacement Cost in Tempe, AZ?
- 7 Signs You Need to Replace Your Water Heater in Tempe
- Tank vs. Tankless Water Heaters: Which Is Best for Tempe Homes?
- What Size Water Heater Do I Need for My Tempe Home?
- How Long Does a Water Heater Last in Arizona?
- Gas vs. Electric Water Heaters: Which Is Best for Tempe Homes?
Request Your Free Tempe Water Heater Quote
Tell our Tempe plumbers what's going on with your unit and we'll come back with a free, no-obligation quote.
Start Your Free Quote
Share a few details about your water heater and our Tempe team will reply with a free, no-pressure estimate.